Demonstration Method of Teaching: Definition, Types, Phases, and Classroom Use
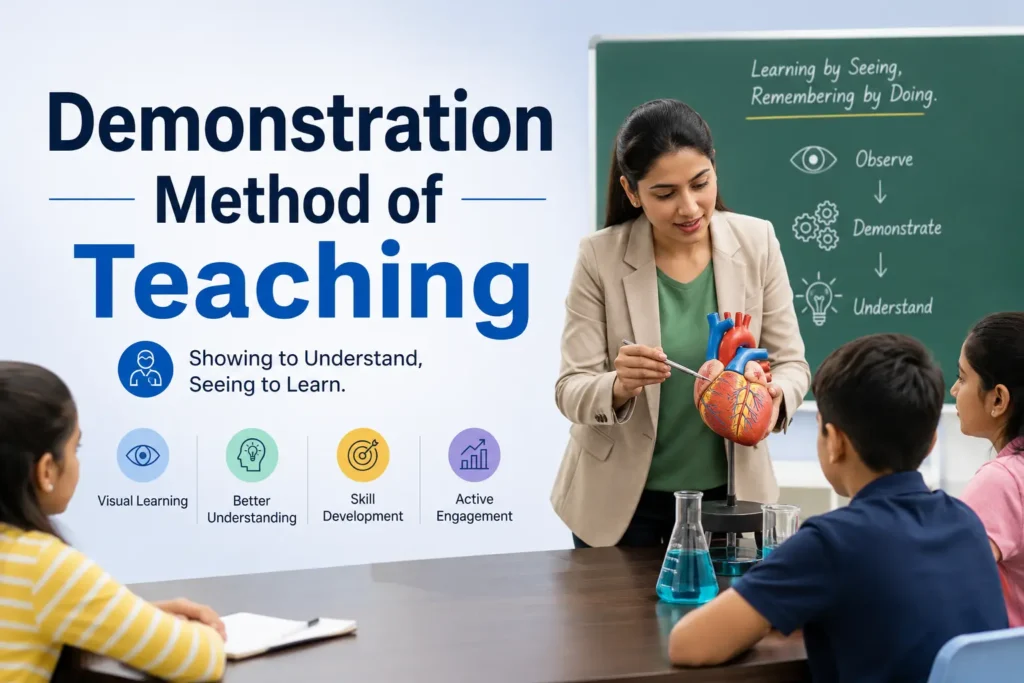
The demonstration method is a visual teaching strategy where a teacher shows students how to perform a task or process, step by step. It follows five to six structured phases, from planning to evaluation, and works especially well in science, mathematics, and skill-based subjects. This method makes complex processes easier to understand by turning explanation into action.
Sometimes telling is not enough.
A teacher can explain how to balance a chemical equation for twenty minutes, or they can simply perform it at the front of the class while students watch each step unfold. The difference in understanding is immediate.
This is the core idea behind the demonstration method. It is one of the most widely used and effective strategies in education because it connects what students hear with what they see. Instead of relying only on words, the teacher performs an action and explains it at the same time.
In this article, you will learn exactly what the demonstration method is, the types used in classrooms, the phases that make it work, and where it is most effective. You will also see how it compares to other common teaching approaches.
What Is the Demonstration Method of Teaching?
The demonstration method is a visual, teacher-led teaching strategy in which the instructor shows students how to complete a task or understand a concept by performing it step by step.
Rather than only explaining a topic through words, the teacher performs the action in front of the class while students observe carefully. As each step is completed, the teacher explains what is happening and why.
The Open University defines demonstration as “a visual practical presentation of a concept, process or skill showing how something works or is performed.” Simply put, it is the practice of teaching through showing, not just telling.
The demonstration method is rooted in the principle of learning by seeing and doing. This connects directly to Edgar Dale’s Cone of Experience, which shows that students retain far more when they observe and participate rather than only listen to a lecture.
At the end of a well-planned demonstration, students have seen a finished example of what they are expected to learn. This gives them a clear target to work toward.
What Is the Purpose of the Demonstration Method?
The main purpose of the demonstration method is to make abstract or complex processes visible and concrete.
When a concept is too difficult to understand through words alone, showing it in action removes the confusion. The method also achieves several other important goals in the classroom:
- It builds psychomotor skills by showing students the correct physical technique before they try it themselves
- It improves engagement because students pay closer attention when something is happening visually in front of them
- It reduces errors and misconceptions by modeling the right process from the start
- It supports memory retention because seeing and hearing information together strengthens recall
- It creates a clear learning target by showing the finished result students are aiming for
For student teachers, B.Ed candidates, and practicing educators, understanding the purpose of this method is the first step to using it well.
What Are the Types of Demonstration Method?
Not all demonstrations look the same. There are four main types used in teaching, and each one serves a slightly different purpose.
1. Pure or Formal Demonstration
In this type, the teacher performs the entire demonstration while students observe without participating. The focus is on watching and understanding before attempting anything independently. This works well for complex procedures where student involvement too early could lead to mistakes.
2. Lecture-cum-Demonstration Method
This is the most widely used type in schools and colleges. The teacher combines verbal explanation with a live performance. As the teacher demonstrates each step, they explain it out loud. This is especially common in science subjects where an experiment is shown alongside a theoretical explanation.
3. Student Demonstration (Return Demonstration)
After the teacher demonstrates, students are asked to repeat or perform the same process themselves. This “return demonstration” confirms whether students have genuinely understood the steps. It shifts the learner from passive observer to active participant.
4. Group Demonstration
In this type, a small group of students performs a demonstration for the rest of the class, often after they have practiced together. This builds confidence, teamwork, and deeper understanding through preparation and peer teaching.
Each type can be chosen based on the subject, the students’ experience level, and the complexity of the concept being taught.
What Are the Phases of the Demonstration Method?
A successful demonstration does not happen by accident. It follows a structured sequence that keeps the lesson organized and ensures students get the most out of it.
Most education frameworks describe five to six phases. Here is how they work:
Phase 1: Planning and Preparation
This is the foundation of the entire lesson. The teacher identifies the learning objectives, gathers all materials, and rehearses the demonstration in advance.
Good preparation prevents disruptions during the class. The teacher also prepares questions to ask before, during, and after the demonstration to keep students engaged.
Phase 2: Introduction
The teacher opens the lesson by explaining what students are about to see and why it matters. This phase sets the context, connects the topic to students’ prior knowledge, and creates curiosity.
A strong introduction gets students ready to observe actively rather than passively.
Phase 3: Presentation of Subject Matter
Before the physical demonstration begins, the teacher presents the key concepts students need to understand the process. This may involve visual aids such as charts, diagrams, or a PowerPoint presentation.
Teaching aids help bridge the gap between theory and the live demonstration that follows.
Phase 4: Performance of the Demonstration
This is the heart of the method. The teacher performs the task step by step in front of the class, explaining each action as it happens.
The demonstration must be visible to all students, done at a clear pace, and carried out neatly and systematically. The goal is to provide a perfect model that students can later follow themselves.
Phase 5: Student Interaction and Questioning
Once the demonstration is complete or at key points during it, the teacher invites questions and discussions. Students share observations, raise doubts, and seek clarification.
This phase is critical. Without it, the lesson risks becoming a one-way performance. Interaction transforms observation into understanding.
Phase 6: Evaluation and Summary
The teacher closes the lesson by reviewing the main points on the board, summarizing what was demonstrated, and checking whether students understood.
This final phase may include a short activity where students answer questions or attempt the task themselves, confirming the learning has taken place.
To go deeper into how each phase is planned and delivered in practice, explore this detailed guide on the steps of the demonstration method.
What Are the Advantages of the Demonstration Method?
Research consistently supports the effectiveness of the demonstration method across different subjects and age groups.
A study on physics teaching found that students taught using the demonstration method significantly outperformed those taught through traditional lecture methods in both achievement scores and retention. A separate study conducted in 2025 aimed to generate empirical data confirming that the demonstration method also improves algebra performance and student retention.
Beyond research findings, teachers and educators recognize these practical advantages in the classroom:
- Improves comprehension for visual and kinesthetic learners who struggle with text-only explanations
- Reduces errors because students see the correct process before attempting it themselves
- Increases student attention since a live activity is naturally more engaging than a lecture
- Supports skill development in technical, vocational, and science subjects
- Makes abstract concepts concrete by turning theory into visible action
- Suitable for all levels including primary, secondary, and higher education
- Builds student confidence before independent practice because the expected standard has been clearly shown
What Are the Limitations of the Demonstration Method?
While the demonstration method is highly effective, it also comes with real challenges that teachers need to plan around.
- Risk of passive learning: If students only watch without being prompted to interact, they may not engage deeply enough to retain the information
- Time-consuming preparation: The teacher must plan, gather materials, and rehearse the demonstration in advance, which takes significantly more time than preparing a lecture
- Not suitable for all topics: Subjects that are purely abstract or conceptual may not benefit from a physical demonstration
- Class size problems: In large classrooms, students at the back may not see the demonstration clearly, reducing its effectiveness
- Equipment dependency: The method relies on having the right tools and materials available, which can be a challenge in under-resourced schools
- Limited student participation during the demo: Students are generally expected to observe quietly, which may frustrate learners who prefer immediate hands-on activity
Recognizing these limitations helps teachers plan compensating strategies, such as using projected visuals, limiting class sizes for practical sessions, or incorporating return demonstrations.
How Does the Demonstration Method Compare to Other Teaching Methods?
Understanding how the demonstration method fits alongside other approaches helps teachers choose the right strategy for each lesson.
| Feature | Demonstration Method | Lecture Method | Experiment Method |
| Definition | Teacher shows and explains step by step | Teacher explains verbally | Students conduct activity independently |
| Best For | Procedural, skill-based learning | Concept delivery and theory | Independent inquiry and discovery |
| Student Role | Active observer; interacts during/after | Passive listener | Active performer |
| Teacher Role | Performer and guide | Primary speaker | Facilitator |
| Preparation Needed | High (materials, rehearsal) | Moderate | High (lab setup, safety checks) |
| Main Limitation | Can become passive if interaction is skipped | Low engagement; no visual model | Requires more time and resources |
The demonstration method sits between the lecture and the experiment on the spectrum of student involvement. It provides more visual engagement than a pure lecture but more structure and guidance than a student-led experiment.
For teachers choosing between these approaches, the question to ask is: “Does my student need to see it done before they can do it themselves?” If the answer is yes, the demonstration method is the right choice.
Where Is the Demonstration Method Most Effective?
The demonstration method works best in subjects where a process, skill, or procedure needs to be visually modeled before students can understand or replicate it.
Subjects where it is most commonly used:
- Science classes: Lab experiments, chemical reactions, biological processes
- Mathematics: Solving equations, constructing geometric figures, working through word problems on the board
- Vocational and technical training: Welding, carpentry, cooking, electrical wiring
- Health and physical education: First aid techniques, sports skills, hygiene practices
- Teacher training programs: B.Ed students and NCTE-regulated teacher education programs use formal demonstration teaching as a required assessment
To see exactly how this method is applied in science classrooms, read the full guide on demonstration in teaching science.
The Demonstration Method in Digital and Hybrid Classrooms (2026)
The demonstration method has adapted well to modern learning environments. In hybrid and online classrooms, teachers now deliver demonstrations through:
- Screen sharing and recorded video demonstrations
- Virtual lab platforms that simulate experiments
- Live video calls where the teacher performs a process on camera
These digital formats preserve the core benefit of the method, showing the process in action, while reaching students beyond the physical classroom. This makes the demonstration method as relevant in 2026 as it has always been.
Final Thoughts
The demonstration method is one of the most practical and proven strategies in teaching. It works because it respects a simple truth: most learners understand something much faster when they can see it happen rather than only hear about it.
From the careful planning phase to the moment students ask questions and summarize what they observed, every phase of a well-run demonstration moves students closer to genuine understanding. Whether you are teaching a science experiment, a mathematical procedure, or a vocational skill, this method gives learners a clear model to follow.
Used alongside other approaches, such as the lecture method for introducing theory and the experiment method for independent practice, the demonstration method forms a powerful middle step in any lesson plan.
If you want to explore all the teaching and learning strategies that support strong classroom practice, browse the full collection at Teaching and Learning Methods. Whether you are a student teacher preparing for your B.Ed exams or a practicing educator refining your approach, understanding methods like this one is what separates effective instruction from simply going through the motions.