Project Method of Teaching: Definition, Steps, Types, and Benefits
The project method of teaching is a student-centered approach where learners solve real-world problems through hands-on projects. Introduced by William Kilpatrick in 1918, it follows five steps: project selection, planning, execution, evaluation, and recording. It builds critical thinking, teamwork, and communication skills. Research from ACER in 2025 shows students using this approach improved their literacy and numeracy scores by 16 to 23 percentage points compared to peers in traditional classrooms.
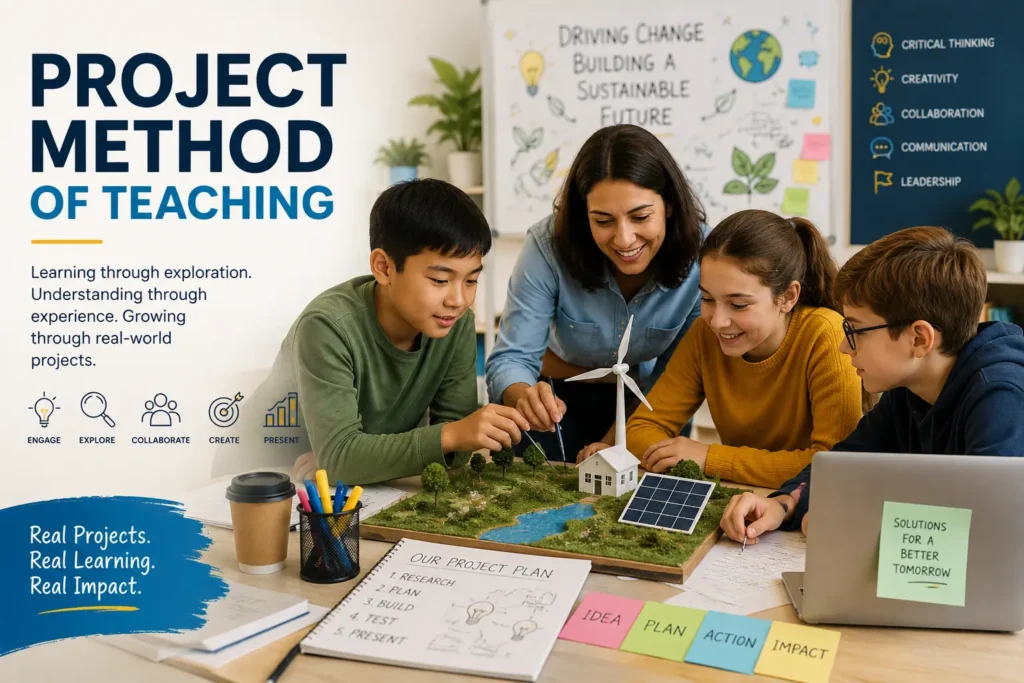
Most students forget classroom lectures within a few days. But when students build a model, solve a real problem, or create something with their hands, they remember it for years. That is the power of the project method of teaching.
The project method of teaching is a student-centered learning approach where students take on meaningful, real-world challenges through planned projects. Instead of simply listening to a teacher explain facts, students actively explore, research, and create. The teacher guides them through the process rather than delivering all the answers.
This guide covers everything you need to know: what the project method is, who created it, the four types of projects, the five key steps, the advantages and disadvantages, and how it compares to modern project-based learning. Whether you are a practicing teacher or a teacher-trainee preparing for exams, you will find everything here.
What Is the Project Method of Teaching?
The project method of teaching is a student-centered instructional approach in which learners solve real-world problems through purposeful, hands-on projects. Rather than delivering content directly, the teacher acts as a guide while students take ownership of their learning through active exploration.
This method is rooted in the philosophy of pragmatism, which means learning must connect to real life to be meaningful. John Dewey, one of the greatest thinkers in education history, believed that students learn best through experience. His core idea was simple: learning by doing.
The project method puts that idea into action. Students do not just read about solving a water shortage. They design a plan to address it. They do not just memorize facts about plants. They grow one, observe it, and document what happens.
This is what makes the project method different from traditional teaching. It is not about what the teacher explains. It is about what the student experiences and creates. The student is an active learner, not a passive listener. The teacher becomes a facilitator, not the sole source of knowledge.
The method works across all subjects and grade levels. It builds independent learners who can think critically, collaborate with others, and communicate their findings clearly.
The History and Origin of the Project Method
The project method of teaching has roots that go back further than most people realize. In the 18th century, European architecture and engineering schools began asking students to apply their skills to real practitioner problems rather than just pass written exams. This was an early form of experiential learning in formal education.
However, the method was formally introduced into modern education by William Heard Kilpatrick in 1918. Kilpatrick was a professor at Columbia University and a close follower of John Dewey’s progressive education philosophy. He published his landmark paper, “The Project Method,” in Columbia University’s Teachers College Record, Vol. XIX, No. 4, in September 1918.
Kilpatrick argued that education should focus on the child’s social and intellectual development, not rote content mastery. He believed that when students work on purposeful activities they genuinely care about, their motivation and retention go up significantly.
His ideas were considered revolutionary at the time. Traditional schools in the early 20th century were lecture-heavy, rigid, and focused on memorization. Kilpatrick’s constructivist approach flipped that model. The student’s goals and interests became the starting point for curriculum design.
Today, Kilpatrick’s framework continues to influence modern education. Project-based learning, inquiry-based learning, and collaborative learning all trace their roots back to his 1918 work.
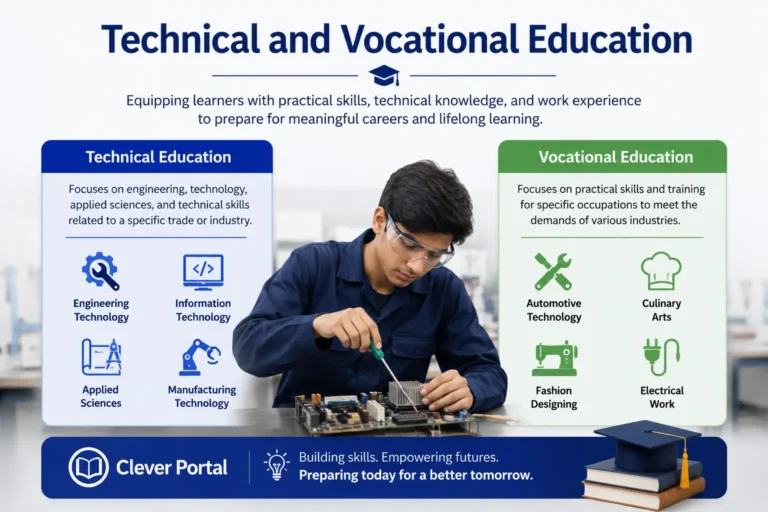
What Are the Types of Projects in the Project Method?
Kilpatrick classified projects into four distinct types, each serving a different educational purpose. Understanding these types helps teachers design projects that match their learning goals.
1. Construction Projects
Students create something tangible. Examples include writing a play, building a science model, designing a poster, or producing a short video. The focus is on making and creating.
2. Enjoyment Projects
Students experience something meaningful. Examples include attending a cultural event, watching a documentary and reflecting on it, or participating in a music performance. The focus is on appreciation and emotional engagement.
3. Problem Projects
Students tackle a real-world issue or challenge. Examples include researching solutions to local pollution, designing a community garden plan, or investigating why food waste happens in the school cafeteria. The focus is on real-world problem solving and critical thinking.
4. Specific Learning Projects
Students acquire a specific skill or piece of knowledge. Examples include learning to use spreadsheet software, mastering a grammar rule through writing practice, or learning to measure angles using geometric tools. The focus is on targeted skill development.
Each type can be used in different subjects and age groups. A teacher might use a construction project in an art class, a problem project in a social studies unit, and a specific learning project in a mathematics lesson. The beauty of the project method is its flexibility across curriculum areas.
For more ways students can direct their own learning journey, read about the independent study method and how it compares to structured project work.
What Are the Steps of the Project Method of Teaching?
The project method follows five clear steps. These steps make sure the learning process is organized, meaningful, and student-driven. The teacher plays a specific role at each stage.
Step 1: Project Selection
The first step is choosing a project. The teacher creates a situation or presents a context that sparks student interest. Students then choose a real-world problem or challenge that is meaningful to them.
The teacher guides the selection process to make sure the project is educationally valuable, realistic, and connected to the curriculum. Good project selection is the foundation of the entire process. A poorly chosen topic leads to disengagement at every step that follows.
Step 2: Planning
Once the project is selected, students create a detailed plan. They decide what tasks need to be done, who is responsible for each task, and how long each part will take.
The teacher facilitates planning discussions, helps students set realistic goals, and makes sure all learners are included. Planning builds organizational skills and helps students think about their project as a whole before diving in.
For a contrast in teacher-directed planning approaches, explore the supervised study method and how it structures learning differently.
Step 3: Execution
This is the action phase. Students carry out their plan, conduct research, build their models, run experiments, or produce their work.
The teacher moves through the classroom as a guide and observer, not an instructor. They ask questions, offer resources, and help students work through problems without solving everything for them. This is where hands-on learning and collaborative learning happen most naturally.
Step 4: Evaluation
After the execution phase, students and the teacher review the work together. They ask: Did we meet our goals? What worked well? What could we do better?
This step builds self-awareness and reflective thinking. Students learn to assess their own performance, which is a key part of developing independent learners. The teacher provides feedback that is constructive and specific, not just a grade.
To see how structured reflection works in other teaching contexts, check out the review method in teaching for a complementary approach.
Step 5: Recording and Reporting
The final step is documentation. Students organize all phases of their project into a structured report or presentation. This includes what they planned, what they did, what they found, and what they learned.
Recording and reporting builds writing skills, communication skills, and the ability to present complex ideas clearly. It also creates a learning record that teachers can use for assessment.
What Are the Advantages of the Project Method of Teaching?
Research consistently shows that the project method of teaching produces strong results across subjects and student groups. Here are the key advantages:
Builds Critical Thinking Skills
When students tackle real problems, they must analyze information, weigh options, and make decisions. This develops higher-order thinking that passive learning rarely achieves.
Develops Teamwork and Communication
Most projects involve working in groups. Students must communicate ideas, listen to others, divide tasks, and handle disagreements. These are core 21st-century skills that employers value highly.
Increases Student Motivation
Students are more engaged when they have a say in what they learn. Choosing their own project topic gives them ownership of the process, which increases intrinsic motivation and reduces disengagement.
Connects Learning to the Real World
Students see why what they are learning matters. A student who designs a water filtration model understands chemistry in a way a textbook exercise cannot provide. Real-world problem solving makes curriculum relevant.
Supports All Learners
Research from a 2021 gold-standard randomized controlled trial by researchers at USC and Michigan State found that students in project-based learning environments outperformed peers in traditional classrooms across all socioeconomic groups and reading levels. In schools using this approach, the percentage of low-income students taking AP tests rose from 30% to 38%.
Backed by 2025 Research
ACER’s 2025 findings showed that students who engaged more deeply with authentic project tasks improved their literacy and numeracy scores by 16 to 23 percentage points compared to peers in traditional instruction. A 2025 systematic review also confirmed that the project-based approach consistently enhances problem-solving, innovative thinking, teamwork, and communication skills.
Builds Long-Term Retention
Because students are actively creating and exploring rather than passively reading, they retain what they learn much longer. Experiential learning creates stronger memory connections than lecture-based instruction.
What Are the Disadvantages of the Project Method?
Like all teaching methods, the project method has real limitations that teachers should plan for before using it.
Time-Consuming
Projects take significantly more time than a standard lesson. Teachers must allocate multiple sessions for planning, execution, and reporting. This can be challenging in schools with tight curriculum schedules.
Requires Significant Planning
A well-run project needs careful preparation from the teacher. Resources, guidance materials, and assessment criteria must all be ready before the project begins. Poor planning leads to confusion and wasted class time.
Assessment Can Be Subjective
Grading a project is harder than marking a multiple-choice test. Different students contribute different amounts of work in group settings. Evaluating individual performance within a collaborative project requires clear rubrics.
Risk of Poor Topic Selection
If students choose a topic that is too broad, too narrow, or disconnected from curriculum goals, the educational value drops sharply. Teachers must balance student choice with curriculum alignment.
Uneven Participation
In group projects, some students tend to do most of the work while others contribute less. Without structured roles and accountability systems, this imbalance can undermine the collaborative learning goals of the method.
For a look at a teaching approach built on structured repetition and skill mastery, contrast this with the drill method of teaching to understand when each approach works best.
Project Method vs. Project-Based Learning: What Is the Difference?
Many educators use “project method” and “project-based learning” as if they mean the same thing. They are related, but they are not identical.
| Feature | Project Method | Project-Based Learning (PBL) |
| Origin | William Kilpatrick, 1918 | Modern K-12 curriculum framework, 1990s onward |
| Structure | Flexible and student-driven | Highly structured with driving questions and milestones |
| Teacher Role | Facilitator and guide | Co-designer and structured coach |
| Assessment | Observation and reporting | Formal rubrics and standards-aligned assessment |
| Flexibility | High | Moderate to low |
The project method is the original educational philosophy formalized by Kilpatrick in 1918. It focuses on purposeful student activity and real-life problem solving, with relatively open-ended structure.
Project-based learning (PBL) is the modern, institutionalized evolution of that philosophy. PBL uses defined driving questions, structured milestones, peer critique sessions, and formal assessment rubrics aligned to academic standards. It is what many schools today call their “project learning” programs.
Think of it this way: the project method is the original idea, and PBL is the organized system built around it. Both share the same core belief that students learn best by doing, but PBL adds more scaffolding and accountability structures for the modern classroom.
How to Use the Project Method of Teaching in Your Classroom
Applying the project method in a real classroom does not have to be complicated. Here are five practical steps to get started:
- Start with a real-world connection. Choose a topic your students encounter in daily life. Local community issues, environmental challenges, or current events all make strong project starting points. Real-world relevance is what drives student motivation.
- Define clear learning goals before you begin. Know what skills and knowledge students should gain by the end of the project. This helps you guide topic selection and evaluate outcomes fairly.
- Assign structured group roles. Give each group member a specific responsibility such as researcher, writer, presenter, or project manager. Structured roles reduce uneven participation and build accountability.
- Build in checkpoint discussions. Stop at the end of each step to check in with groups. Ask guiding questions rather than giving answers. This keeps projects on track without removing student ownership of the process.
- Use the recording phase as a true reflection tool. Encourage students to write not just what they did, but what surprised them, what was difficult, and what they would change. Reflection deepens understanding far more than a summary ever can.
For a related approach that works well alongside project work, read about the tutorial method of teaching and how small-group instruction supports individual student progress.
Final Thoughts
The project method of teaching is one of the most powerful tools an educator can use. It shifts the focus from passive listening to active doing. It builds the skills students actually need in real life: critical thinking, problem solving, collaboration, and communication.
William Kilpatrick introduced this approach over 100 years ago, and modern research in 2025 continues to confirm what he believed: students who learn through purposeful, hands-on projects outperform their peers on virtually every meaningful measure.
The method is not without challenges. It takes time, planning, and careful assessment design. But when done well, it produces learning that students carry with them for years.
If you want to build a stronger foundation in teaching and learning strategies, start with our complete guide to teaching and learning methods. It covers a wide range of instructional approaches so you can choose the right method for every learning goal.